
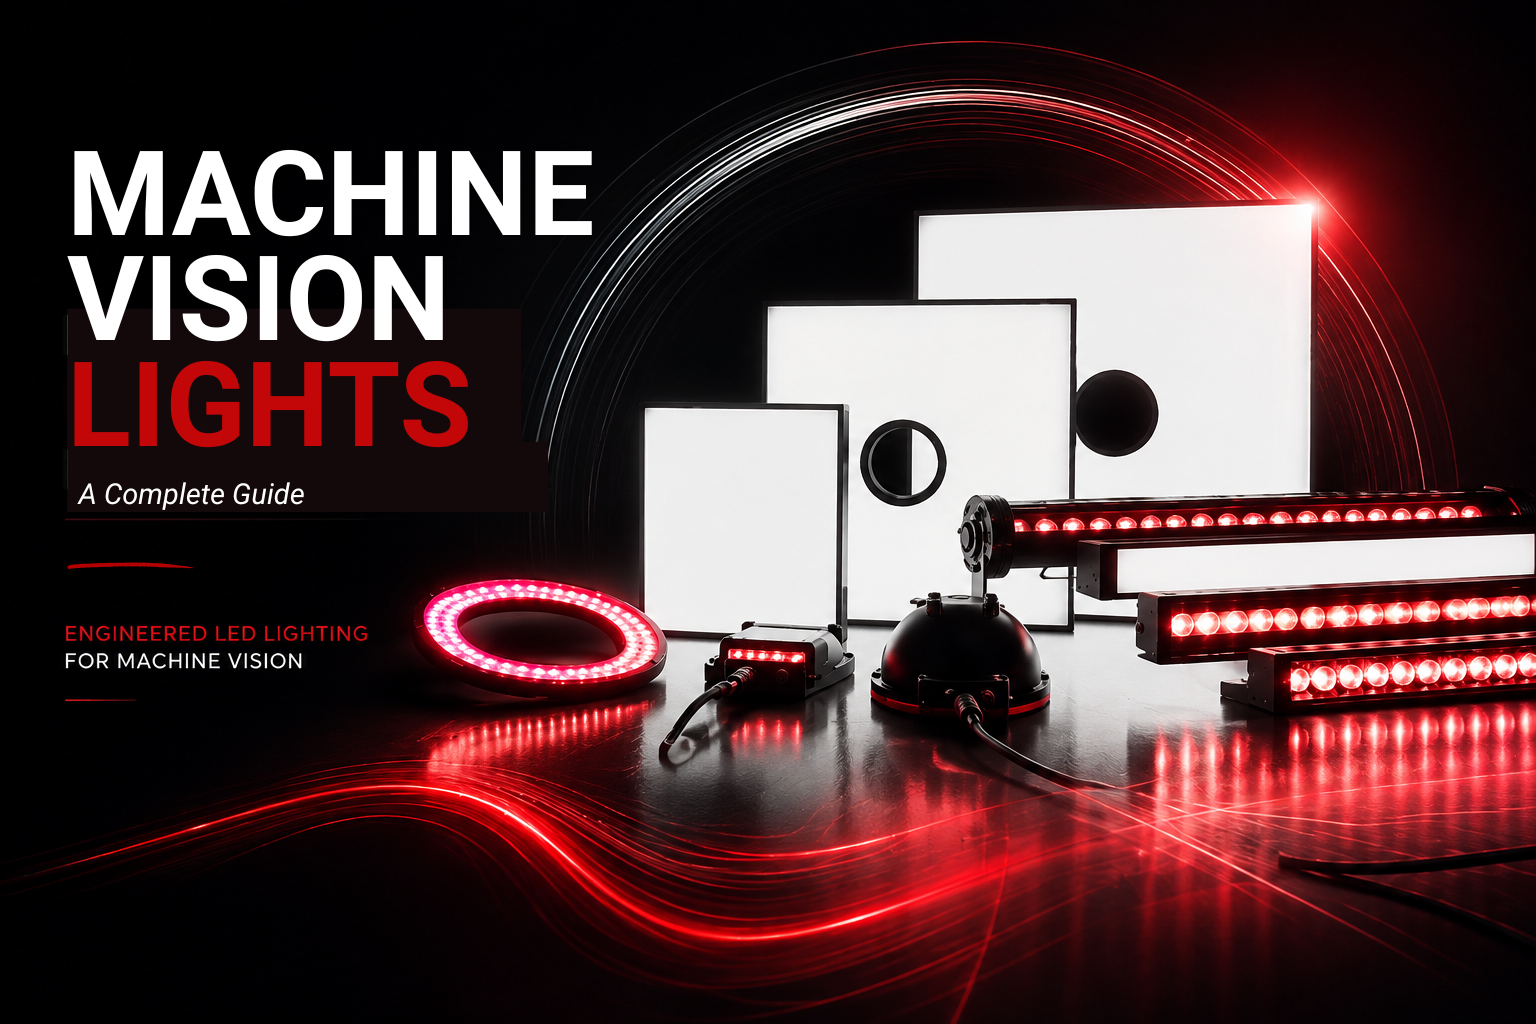
A MACHINE VISION LIGHT is the single most important component of any industrial imaging system, and often the most overlooked. In this guide, you will find all the types, techniques, wavelengths to consider when choosing the right machine vision light for your industrial application.
Table of Contents
How to Choose the Right Industrial LED Lighting for Your Vision System
Before a camera can inspect a product, read a code or guide a robot, the right machine vision light has to reveal the feature of interest with strong, repeatable contrast. Get the lighting right and even a modest camera performs reliably; get it wrong and no amount of software or processing power will rescue the image.
This guide explains what machine vision lights are, how they work, the main types and lighting techniques, how colour and wavelength affect contrast, and how to choose the right light for your application. It is written for automation engineers, integrators and buyers who want a clear, practical reference in one place. TPL Vision has designed and manufactured LED illumination for machine vision, identification and robotics since 2005, and this guide distils that experience into a single resource.
What is a Machine Vision Light?
A machine vision light is a specialised light source designed to illuminate a scene so that a camera and its image-processing software can reliably detect, measure, read or verify a feature. Unlike ordinary room or workplace lighting, a machine vision light is engineered for consistency, controllability and contrast. It produces a stable, repeatable output, in a specific geometry, intensity, colour and beam angle, so that every image the camera captures looks the same, part after part, shift after shift.
Almost all modern machine vision lights use LEDs (light-emitting diodes) as their source. LEDs are compact, efficient, long-lived, available in many wavelengths and (critically) can be switched and pulsed extremely quickly. This makes an LED machine vision light ideal for the fast, precisely timed imaging that industrial automation demands.
The purpose of a machine vision light is not simply to make a scene „bright“. Its job is to maximise the contrast between the feature of interest and everything else (a scratch against a smooth surface, printed text against packaging, the edge of a component against its background) while minimising glare, shadows and reflections that would confuse the vision system.
Machine Vision Light vs. General Lighting
Three properties separate a purpose-built machine vision light from ordinary illumination:
- Stability: the output does not flicker or drift, so image brightness is repeatable frame to frame
- Controllability: intensity and timing can be controlled precisely, and the light can be strobed in sync with the camera
- Defined Geometry: the shape, angle and diffusion of the light are chosen to create a specific lighting effect on the part
Why Lighting is the Most Critical Component of a Machine Vision System
A machine vision system is a chain: light source, lens, camera, and image-processing software. The image the software receives can only ever be as good as the light that created it. Experienced integrators often say that lighting accounts for the majority of the success, or failure, of a vision application. Investing in the right machine vision light is almost always cheaper and more effective than compensating for a poor image with a more expensive camera or more complex software.
Good lighting delivers several benefits at once:
- Higher contrast: the feature of interest stands out clearly from its surroundings.
- Consistency: stable images reduce false rejects and missed defects.
- Robustness to ambient light: a strong, controlled machine vision light overpowers changing factory light so results stay reliable.
- Faster processing: a clean, high-contrast image needs less software correction, allowing higher line speeds.
- Lower total cost: solving a problem with lighting is usually the most economical route.
How Machine Vision Lighting Works: Light, Surfaces and Contrast
To choose a machine vision light well, it helps to understand what happens when light meets an object. Light striking a surface is reflected, absorbed or transmitted, and the balance between these depends on the surface’s material, texture, colour and shape, as well as the angle of the light. Machine vision lighting is really the craft of controlling these interactions to produce a useful image.
Reflection: Specular vs Diffuse
Specular reflection is mirror-like: light bounces off a shiny surface at a predictable angle. It can create bright hotspots or glare that hide detail, but, used deliberately, it can also make defects pop. Diffuse reflection scatters light in all directions from a matte or textured surface, producing softer, more even images. Matching the light and its angle to the surface finish is central to good machine vision lighting.
The Angle of Illumination
The angle at which light strikes the part is often more important than raw brightness. Light hitting a surface almost flat (low angle) throws long shadows that emphasise surface texture, embossing and scratches. Light coming from directly above (on-axis) produces flat, even illumination that hides texture and is ideal for flat, reflective surfaces. Choosing the angle is what separates lighting techniques such as brightfield and darkfield, discussed below.
Polarisation
Polarisation is regularly used in machine vision applications. Adding polarisers to machine vision lights reduces glare, improves contrast, and reveals fine details so that inspection systems can deliver more accurate, reliable results. The bar and ring light polarisers from TPL Vision, offers flexibility to tailor lighting setups for even the most reflective or complex inspection challenges.
Types of Machine Vision Lights
Machine vision lights are classified mainly by their physical form and the lighting geometry they create. Most vision applications are solved with one, or a combination, of the following light types. TPL Vision manufactures each of these as a dedicated product range.

BAR LIGHTS are long, rectangular LED illuminators, the workhorses of machine vision. Used singly or in pairs, at a range of angles, they are extremely versatile. They are suitable for surface inspection, code reading, label verification and general illumination across large fields of view. High-power strobed bar lights can deliver enormous brightness for fast-moving lines such as logistics scan tunnels.

RING LIGHTS mount around the camera lens and provide even, shadow-reduced illumination along the camera’s optical axis. They are quick to deploy and popular for code reading, presence/absence checks and general inspection. Diffused and angled variants adapt ring lighting to reflective or textured parts.

BACKLIGHTS (Flat Lights) sit behind the object and illuminate it from the rear, so the camera sees a dark silhouette against a bright background. This is the go-to machine vision light for dimensional measurement, edge detection, presence/absence and detecting holes or gaps, because it produces extremely high-contrast and sharp outlines.

DOME LIGHTS bounce light off the inside of a curved diffuser to bathe the object in soft, uniform light from every direction. This virtually eliminates glare and shadows on curved, shiny or uneven surface, ideal for reading codes on reflective packaging, cans, jars and metallic components.

DARK FIELD LIGHTS illuminate the part at a very shallow angle from the side. Smooth areas reflect the light away from the camera and appear dark, while raised or engraved features (scratches, embossing, dot-peen codes, edges) catch the light and appear bright. Low-angle dark field lighting is essential for reading engraved or embossed marks and for surface-defect detection.

SPOT LIGHTS concentrate intense illumination onto a small area, often through a lens or via a fibre-optic guide. They suit small-part inspection, coaxial setups and situations where a bright, focused beam is needed within a confined space.
COAXIAL (on-axis) LIGHTS use a beam-splitter to direct light along the exact optical axis of the camera. Flat, specular surfaces reflect the light straight back, appearing bright, while any texture or defect scatters it away and appears dark. This makes coaxial lighting excellent for flat, highly reflective objects such as wafers, discs, glass and mirror-finished metal.

LINE SCAN LIGHTS produce an intense, uniform line of illumination matched to a line scan camera, which builds an image one row of pixels at a time as the product moves past. They are used for continuous web inspection, high-resolution imaging of large or cylindrical objects, and very high-speed lines.
Machine Vision Lighting Techniques
While the light types above describe hardware, lighting techniques describe the geometry, how the light is positioned relative to the part and camera to create a specific effect. The same bar light, for example, can be used for several techniques depending on where you place it.
BRIGHTFIELD (Direct) LIGHTING: In brightfield lighting, light is directed so that it reflects off the surface and back into the camera. Smooth surfaces appear bright and features that scatter light appear dark. It is the most common, general-purpose technique and works well for many surface and print inspections, though it can create glare on shiny parts.
DARKFIELD LIGHTING (Low Angle): In darkfield lighting, light strikes the part at a shallow angle so the specular reflection misses the camera. The background stays dark and only raised, engraved or defective features light up. This technique is the key to reading embossed and dot-peened codes and to finding surface scratches and edges.
BACK LIGHTING: Back lighting is a high-contrast lighting technique that illuminates an object from behind, creating a dark silhouette against a bright background. This produces sharp, well-defined edges, making it ideal for dimensional measurement, edge detection, presence/absence checks, and detecting holes or gaps.
DOME LIGHTING: Dome lighting is a diffuse lighting technique that uses a curved diffuser to provide soft, uniform illumination from multiple directions. It minimises glare, harsh reflections and shadows, making it ideal for curved, shiny or uneven surfaces. Dome lighting is particularly effective for code reading and inspection on reflective packaging, cans, jars and metallic components.
COAXIAL/ON-AXIS LIGHTING directs illumination along the same optical axis as the camera using a beam splitter. Light strikes the surface directly and, on flat, specular surfaces, is reflected back towards the camera, producing a bright, uniform appearance. Surface features such as texture, scratches, dents or defects disrupt this reflection and scatter the light away from the camera, causing them to appear dark or high-contrast.
Choosing a Technique
The right technique depends on the feature you need to see and the surface it sits on. The table below summarises common pairings.
| GOAL / FEATURE | RECOMMENDED TECHNIQUE | TYPICAL LIGHT TYPE |
|---|---|---|
| Measurement, Edges, Presence | Backlighting | Backlight |
| Codes on Shiny / Curved Parts | Diffuse/ Dome | Dome Light |
| Engraved / Embossed / Dot-peen Codes | Darkfield (low-angle) | Darkfield / Bar |
| Print and Label Inspection | Brightfield or Diffuse | Bar or Ring |
| Scratches on Flat Reflective Parts | Coaxial or Darkfield | Coaxial / Darkfield |
| General Surface Inspection | Brightfield | Bar or Ring |
Machine Vision Light Colours and Wavelengths
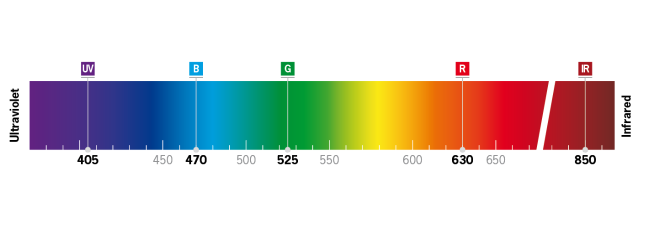
The colour (wavelength) of a machine vision light has a powerful effect on contrast. Choosing the right colour is often the difference between a feature that is clearly visible and one that disappears. The guiding principle comes from colour theory: Light of a similar colour to a feature makes it appear brighter, while light of a complementary (opposite) colour makes it appear darker.
For example, a red light makes red features look pale and washes them out, while a blue or green light makes those same red features appear dark and high-contrast. Integrators use a colour wheel to predict these effects and select the wavelength that best separates the feature from its background.
Common Wavelengths and Where They are Used
| COLOUR / WAVELENGTH | TYPICAL USE |
|---|---|
| White | General purpose; colour inspection with colour cameras; best when feature colours vary |
| Red (~625 nm) | Most common; efficient, high contrast on many materials; good for monochrome cameras |
| Blue (~470 nm) | Fine detail and contrast on red/orange or metallic parts; sharper edges |
| Green (~525 nm) | Contrast on red features; used with some sensors for balanced response |
| Infrared (IR, 850–940 nm) | Sees through some inks/plastics; reduces effect of surface colour; good in variable ambient light |
| Ultraviolet (UV, ~365–405 nm) | Fluorescence inspection, detecting coatings, glue, marks invisible to the eye |
| SWIR (1050–2500 nm) | Sees through materials, inspects fill levels, moisture and content behind packaging |
MONOCHROME vs COLOUR CAMERAS
Most machine vision uses monochrome cameras, which are more sensitive and higher resolution than colour cameras and respond to brightness rather than hue.
With a monochrome camera, choosing the light colour is how you „create“ contrast.
Colour cameras are used when the task genuinely depends on distinguishing colours, for example verifying the colour of components or print, and generally pair with white illumination.
BEYOND VISIBLE LIGHT: UV, IR and SWIR
Ultraviolet (UV) light causes certain materials to fluoresce, revealing adhesives, coatings, contamination or security marks that are invisible under normal light.
Infrared (IR) light penetrates some inks and plastics and is less sensitive to surface colour, which helps in applications with variable materials or strong ambient light.
Short-wave infrared (SWIR) goes further still, allowing vision systems to see through certain opaque materials to check fill levels, moisture content or contents behind packaging. These wavelengths expand what a machine vision light can reveal well beyond human vision.
LED Machine Vision Lights vs Other Light Sources
Older vision systems used halogen, fluorescent, xenon or metal-halide sources. Today LED machine vision lights dominate because they outperform these on almost every metric that matters for industrial imaging.
| PROPERTY | LED MACHINE VISION LIGHT | HALOGEN / FLUORESCENT / METAL-HALIDE |
|---|---|---|
| Lifespan | Typically 50,000+ hours | Hundreds to a few thousand hours |
| Stability | Very stable, minimal drift | Output drifts and flickers with age |
| Heat | Comparatively low, directed | High; can affect parts and optics |
| Energy Efficiency | High | Low to moderate |
| Size / Form Factor | Compact, flexible geometries | Bulky |
Continuous, Strobed and Pulsed Lighting
Continuous (DC) lighting keeps the light on at a steady level and is simple to set up, making it suitable for stationary parts or slower lines. Strobed (pulsed) lighting flashes the light in precise synchronisation with the camera’s exposure. Strobing has three big advantages: it freezes motion on fast lines, it allows the LED to be overdriven for much higher peak brightness, and it extends LED life because the light is only on for a fraction of the time.
Strobing requires a lighting controller (or a light with built-in strobe control) to trigger the flash and manage timing and current. A controller also lets you adjust intensity, switch between lights, and combine several lighting techniques in sequence. Modern external control platforms let one controller drive multiple lights, making complex, multi-light setups easier to build and scale.
The ability to strobe and overdrive LEDs, driving them with a short, high-current pulse synchronised to the camera exposure, lets an LED light deliver far more light for a brief instant than it could continuously. This is what freezes fast-moving products without blur and lets a machine vision light overpower ambient light.
How to Choose the Right Machine Vision Light
Match the light to your application requirements.
1. Define the feature and the task
What exactly must the system see, a 2D code, a scratch, a dimension, printed text, a colour? The feature drives every other decision.
2. Study the surface
Is it flat or curved, matte or shiny, coloured or metallic, transparent or opaque? Surface finish determines whether you need diffuse, directional or backlighting.
3. Choose the Technique
Decide between brightfield, darkfield, backlight, diffuse/dome or coaxial based on the feature and surface (see the technique table above).
4. Select the light type and geometry
Pick the form factor, bar, ring, dome, backlight, dark field, spot or line scan, that delivers that technique in your available space.
5. Choose the colour / wavelength
Use colour theory to maximise contrast: similar colours brighten, opposite colours darken. Consider UV, IR or SWIR for special cases.
6. Account for geometry and distance
Match the light's size and beam to your field of view and working distance. Large fields of view from a distance need high-power, appropriately angled lights.
7. Factor in line speed
Fast-moving lines need strobed, high-power lighting and a controller to freeze motion.
8. Match the environment
Choose an appropriate IP rating for dust, washdown or moisture, and consider heat, vibration and food-safe or chemical-resistant housings.
9. Test before committing
Whenever possible, trial the light on real parts. Reputable suppliers offer product loans so you can validate the setup before buying.
Machine Vision Light Buyer’s Guide: Checklist
Use this checklist to specify a machine vision light and compare suppliers. Having clear answers to each point will make selection faster and reduce costly re-work.
- Application defined: the feature, defect or measurement is clearly described.
- Surface characterised: material, finish, colour, curvature and reflectivity noted.
- Technique selected: brightfield, darkfield, backlight, diffuse/dome or coaxial.
- Light type & size chosen to suit the field of view and working distance.
- Wavelength/colour chosen to maximise feature contrast.
- Brightness & strobe: sufficient output for the line speed; strobing and a controller specified if needed.
- Environmental rating: correct IP rating and housing for the factory conditions.
- Integration: mounting, connectors, camera trigger and controller compatibility confirmed.
- Compliance & quality: ISO-certified manufacturer, CE marking, documented specifications.
- Support & warranty: technical advice available, product loans offered, and a solid warranty (up to three years from leading suppliers).
- Future-proofing: modular, scalable range so the setup can adapt as needs change.
Environmental and Practical Considerations
IP Ratings
Industrial environments are harsh. A machine vision light’s IP (Ingress Protection) rating, expressed as two digits, states how well the housing resists solids/dust (first digit) and water (second digit). A food-production washdown line may demand IP69K, while a clean, dry electronics line may need far less. Always match the IP rating to the real conditions the light will face.
Heat, Lifespan and Reliability
LEDs are efficient but still generate heat, and heat is the main enemy of LED brightness and lifespan. Well-designed machine vision lights manage heat through good thermal design and, where relevant, by strobing. A quality LED light should offer tens of thousands of hours of stable service, which is why leading manufacturers can offer multi-year warranties.
Modularity and Flexibility
A modular machine vision light range, where diffusers, angle changers, colours and mounts can be configured or swapped, simplifies selection, reduces the number of parts to stock, and lets a single platform adapt to new applications. Modularity is increasingly important as production lines change more frequently.

Frequently Asked Questions
What is a machine vision light?
A machine vision light is a specialised, usually LED-based light source designed to illuminate a scene so a camera and its software can reliably inspect, measure or read a feature. It is engineered for stable, controllable, high-contrast illumination, unlike ordinary lighting.
Why is lighting so important in machine vision?
The image a vision system analyses can only be as good as the light that created it. Correct lighting maximises contrast and consistency, reduces errors, and is usually the most cost-effective way to make an application reliable, more so than upgrading the camera or software.
What are the main types of machine vision lights?
The main types are bar, ring, backlight, dome, dark field (low-angle), spot, line scan and coaxial (on-axis) lights. Each creates a different lighting geometry suited to particular features and surfaces.
What colour of machine vision light should I use?
Use colour theory: a light of similar colour to a feature makes it appear brighter, while an opposite colour makes it darker and higher-contrast. Red is the most common; blue, green, UV, IR and SWIR are chosen for specific materials and tasks.
Why are LED machine vision lights preferred?
LEDs last far longer, are more stable, come in many wavelengths, run cooler and can be switched and strobed in microseconds, making them ideal for fast, precise industrial imaging compared with halogen or fluorescent sources.
What is strobing and do I need it?
Strobing flashes the light in sync with the camera exposure. It freezes fast-moving parts, boosts peak brightness through overdriving, and extends LED life. It is essential on high-speed lines and requires a lighting controller.
How do I choose the right machine vision light?
Define the feature, study the surface, pick a lighting technique, choose the light type and geometry, select the wavelength for contrast, account for field of view, working distance and line speed, and match the IP rating to the environment. Trial the light on real parts before buying.
What is the best machine vision light for reading a barcode on a shiny surface?
Dome lighting is often the best choice for reading barcodes on shiny or reflective surfaces, as its diffuse illumination helps reduce glare and hotspots. This creates a more uniform image, making the barcode easier for the camera to detect and decode reliably. For flat, highly reflective surfaces, coaxial lighting can also be an effective option.
Common Applications of Machine Vision Lights
Industries include: Logistics, food and beverage, pharmaceutical, automotive, electronics and packaging
Code Reading & Traceability
Reading 1D/2D barcodes, DataMatrix and dot-peen codes on products and packaging.
Print & Label Inspection
Verifying text, date codes, labels and print quality.
Presence / Absence & Assembly Verification
Checking that components are present and correctly assembled.
Dimensional Measurement
Gauging size and position, usually with backlighting.
Surface & Defect Inspection
Finding scratches, dents, contamination and finish flaws.
Robot & Vision Guidance
Giving robots the reliable images they need to pick, place and navigate.
Conclusion
Choosing the right machine vision light is the highest-leverage decision in any vision project. By understanding the light types, techniques, wavelengths and selection factors covered in this guide, you can create clean, high-contrast images that make inspection reliable, fast and cost-effective. When lighting is right, everything downstream, camera, lens and software, works better.
Need help choosing a machine vision light?
TPL Vision has specialised in LED illumination for machine vision, identification and robotics since 2005, with an ISO 9001-certified range, free 15-day product loans and warranties of up to three years. Get in touch to find the right lighting solution for your application.