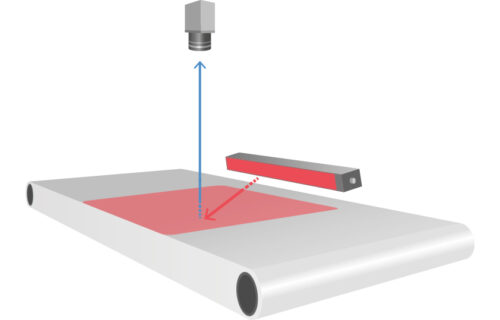
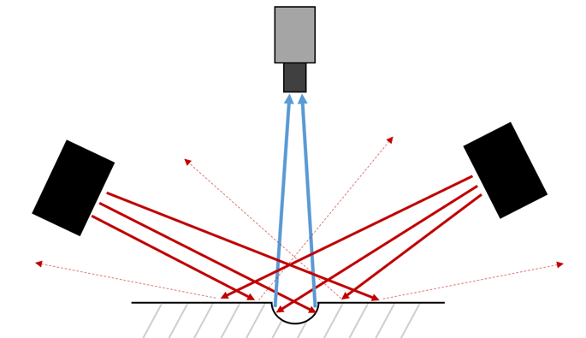
Darkfield lighting is when the illuminators are positioned at 45° to 90° from the camera’s optical axis.
By using this method, whilst pairing the Modular Bar with the correct Angle Changer, it is possible to highlight features on shiny components and other parts with producing or sunken features.
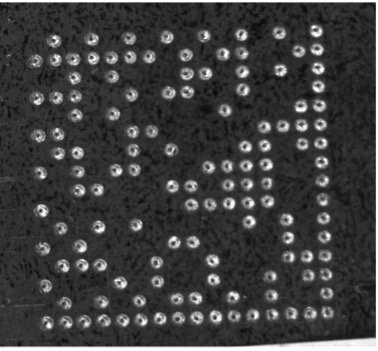
Darkfield lighting works effectively on both engraved and embossed features. Either way it works the same: only a portion of the light that strikes the highlighted edge reaches the camera, the rest of the light will not be captured by the camera. This is why the image appears like a negative, where there is more black area that white (in monochrome images). The example above on the left hand side shows a dot peen marked code being illuminated by darkfield lighting.
To create a darkfield effect with the Modular Bar is easy. Simply select the right angle changer based on your field of view and illumination angle.
For full darkfield lighting in the range of 90° to 75° there are two suitable Angle Changers (AC’s):
The Modular Bar+ AC-EBAR-N will give some nice diffusion but create a narrow beam that’s suitable for darkfield lighting when reasonably close to the target.
The Modular Bar + AC-EBAR-L (elliptical light beams) will create the best ‘blade’ of light as the elliptical lenses form a linear light pattern that is excellent for darkfield lighting for close and far working distances.
The Modular Bar with no AC is the best for creating a darkfield when the light is quite far from the target. When no AC is attached it is the ultra narrow lens angle as default.
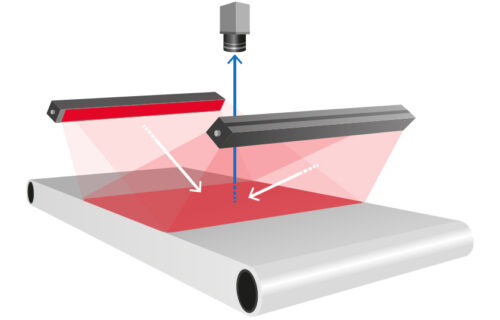
Depending on your sample you may need 1, 2 or 4 Bar-lights.